With Excel Online you use your web browser to create, view, and edit workbooks you store on OneDrive or Dropbox. If your organization or college has an Office 365 plan or SharePoint site, start using Excel Online by creating or storing workbooks in libraries on your site.
Note: If you’re using Excel Web App with SharePoint 2010, or if you're using Internet Explorer 7, see Introduction to Excel Web App.
Create an online workbook
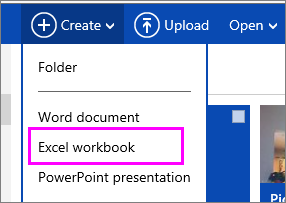
1. From your OneDrive, click Create > Excel workbook.
2. To rename the workbook, click the default file name and type a new one.

Share workbooks online
After you’ve created your online workbook, you can share it with friends, coworkers, or the public. People can view your worksheets, sort and filter data, and drill into the details of PivotTables on the web or mobile device.
To share a workbook, click Share and type email addresses of people you want to share with or get a link you can email to your contacts.

Edit in the browser
If you try to enter data, set up a formula, add charts, or apply basic formatting and nothing happens, you’re probably in read-only view. Here's how you can switch to editing view:
Click Edit Workbook > Edit in Excel Online.
For more advanced editing options, click Edit in Excel.
Excel Online saves your work automatically however, if you change your mind about any changes you’ve just made, use Undo or press Ctrl+Z.
Work together on the same worksheet
When you’re working with others in Excel Online, you can edit the worksheet as you usually would. When others edit the worksheet, Excel Online shows their presence and the updates right away. This only works when everyone is working in Excel Online.

Other versions of the Excel app also allow working with others at the same time. See Collaborate on Excel workbooks at the same time with co-authoring for more information.
Print in Excel Online
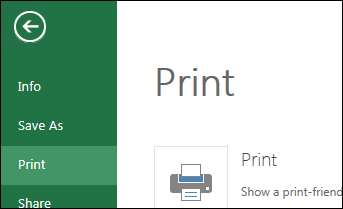
1.Select the cells or chart you want to print, and then go to File > Print. To print the whole worksheet, don’t select anything before going to the Print command.

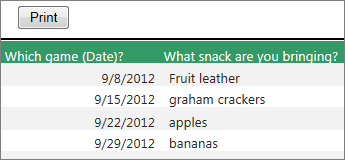
2. Click Print for a preview.
3. If you change your mind about printing a selected area, choose the Entire Sheet print option and click Print.
4.If the final print preview looks right, click Print.

Learn more about printing gridlines in a worksheet.
Kindly refer the below links
Was this article helpful?
That’s Great!
Thank you for your feedback
Sorry! We couldn't be helpful
Thank you for your feedback
Feedback sent
We appreciate your effort and will try to fix the article